Direwolf is a software modem. Instead of relying on a hardware terminal node controller the software does the decoding and encoding for you. My installation will use a Alinco DR-135MK III, RIGblaster Nomic and Direwolf on a Linux Debian OS.
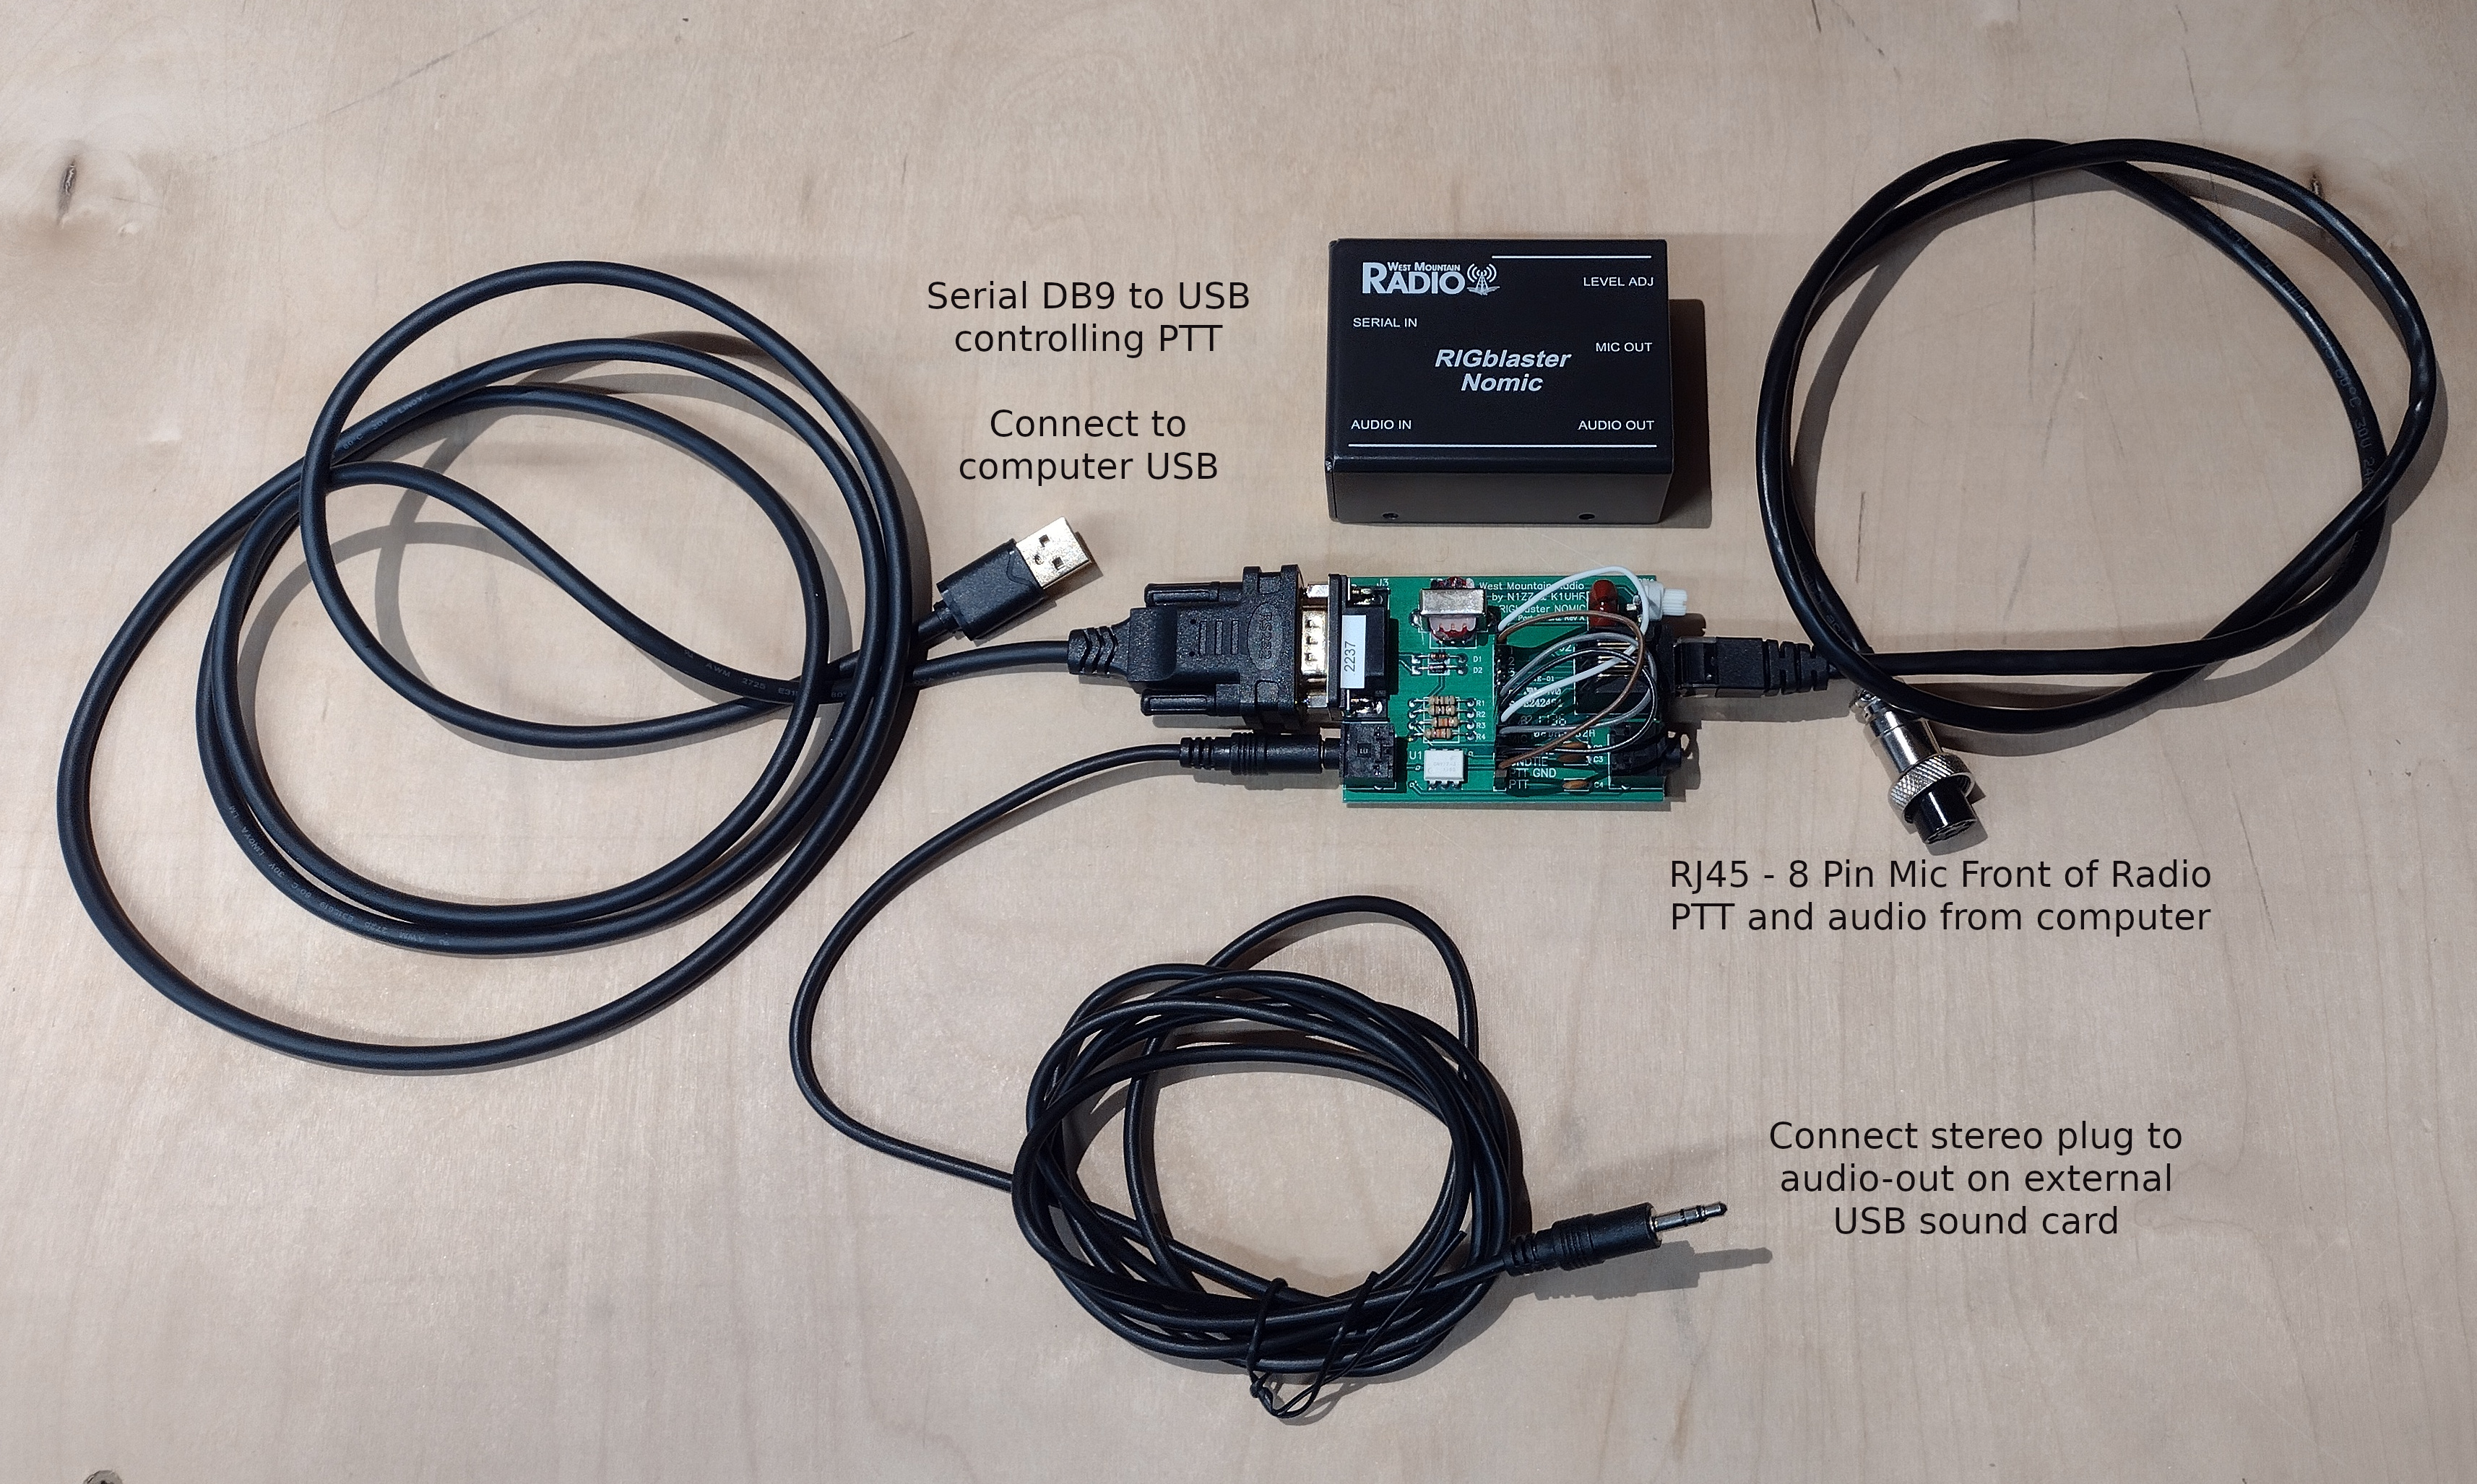
The audio output from the radio external speaker is connected to an external USB sound card via a stero plug. The USB sound card is plugged into a USB port on the computer. The RIGblaster is connected to the front 8-pin microphone jack on the radio, The RIGblaster is connected to a USB port on the computer via a DB9 serial connection. I had to replace the serial to USB cable that came with the RIGblaster which had a Prolific Tech chipset with another one I purchased from Amazon that had an FTDI chipset. The stock cable did not work. The external USB sound card provides the receive audio from the radio. This is how you see incoming packet/APRS traffic. The audio output from the computer (transmitted packets) is also routed through the external USB sound card. Connect a stero plug from the external USB sound card headphone jackc to the stereo audio-in jack on the RIGblaster. The RIGblaster then routes the audio and PTT control through the RJ45 to the mic input on the radio.
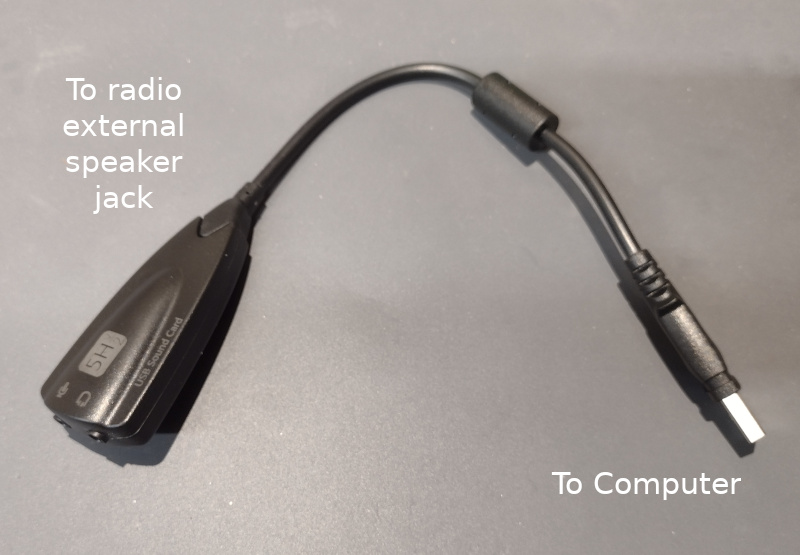
I am using an Alinco DR-135MK III. Remove the microphone from the front of the radio and plug in the 8 Pin to RJ-45 cable that was supplied with the RIGblaster. Plug the round 8 pin jack into the radio and the RJ-45 into the Mic Out on the RIGblaster. Connct the 1/8 inch sterio mini-plug supplied by RIGblaster into the external speaker port on the back of the radio. Plug the other end of the 1/8 stereo cord into the supplied USB plug-and-play sound card mic jack. Note this is not the RIGblaster itself it is a seperate cable with an integrated sound card. Plug the USB end into the USB port on your computer.
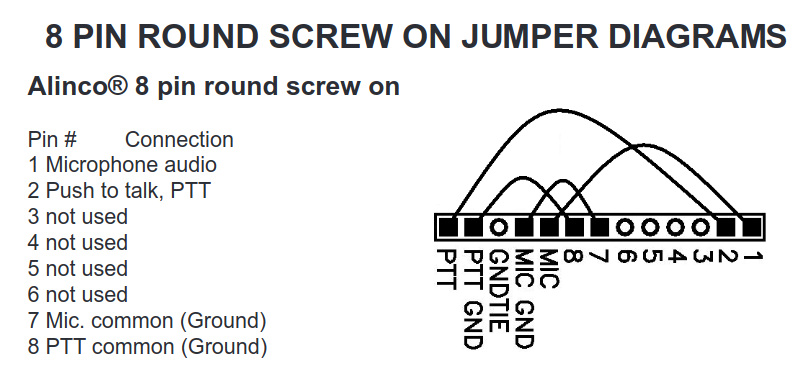
Configure the jumpers on the Nomic for your specific radio. In our case it will be an Alinco
Plug the stereo cable into the headphone jack of the USB Sound Card. Plug the other end into the RIGblaster AUDIO IN jack.
Plug the serial to USB cable that came with the rig blaster into your computer USB port and type...
You should see a new USB device on mine it was ttyUSB0
At the command line type....
This will give you all the information you need about your new USB device ....
[51148.645250] usb 3-1.2.3: new full-speed USB device number 12 using xhci_hcd
[51148.770600] usb 3-1.2.3: New USB device found, idVendor=0403, idProduct=6001, bcdDevice= 6.00
[51148.770602] usb 3-1.2.3: New USB device strings: Mfr=1, Product=2, SerialNumber=3
[51148.770604] usb 3-1.2.3: Product: USB Serial Converter
[51148.770605] usb 3-1.2.3: Manufacturer: FTDI
[51148.770607] usb 3-1.2.3: SerialNumber: FTDKOMKB
[51148.776604] ftdi_sio 3-1.2.3:1.0: FTDI USB Serial Device converter detected
[51148.776627] usb 3-1.2.3: Detected FT232R
[51148.784827] usb 3-1.2.3: FTDI USB Serial Device converter now attached to ttyUSB0
You may use the ttyUSB0 device name but this may change depending on the sequence of how you plug in your USB devices. It would be best to create a persistent device name for the USB port for this device. So, we need to create a rule by doing the following.....
Add the following to the file above based on the device information you found in dmesg above...
ATTR{idVendor}=="0403", RUN+="/sbin/modprobe -q ftdi_sio", RUN+="/bin/sh -c 'echo 0403 $attr{idProduct} >/sys/bus/usb-serial/drivers/ftdi_sio/new_id'"

SUBSYSTEM=="tty", ATTRS{idVendor}=="0403", ATTRS{idProduct}=="6001",  SYMLINK+="NOMIC"
The first line of code makes sure the FTDI driver is loaded.
The second line creates a symlink or persistent name for the FTDI serial cable.
Note that the idVendor and idProduct are specific to your type of cable. This information can be found when you run sudo dmesg -w or sudo journalctl -f
Unplug the USB device
Restart the services by typing ...
Plug the device back in and then check if it is connected with the new symbolic link
This receives audio from the radio for decoding by Direwolf. The RigBlaster Nomic takes care of the PTT via the serial connection.
On the command line type the following....
This will list all sound capture devices in your system. The USB sound card that RIGblaster provided is identified below as Card 2 Device 0 or simply 2,0 which you will need for the Direwolf configuration file.
card 4: Device [USB PnP Sound Device], device 0: USB Audio [USB Audio]
Subdevices: 0/1
Subdevice #0: subdevice #0
Edit the direwolf configuration file for your own settings. These are the initial settings I used to get things up and running and beacon my position. Don't forget to uncomment your settings by removing the "#" or they will not be active.
ADEVICE plughw:4,0
CHANNEL 0
MYCALL N9WIB
MODEM 1200
PTT /dev/NOMIC RTS # note: this may also be /dev/ttyUSB0 RTS if I don't use a persistent Symlink
PBEACON delay=1 every=10 overlay=S symbol="digi" lat=42^58.00N long=089^46.47W power=50 height=20 gain=4 comment="Testing" via=WIDE1-1,WIDE2-1
AGWPORT 8000
KISSPORT 8001
Save the configuration settings above and go back to the command line and type direwolf to start the modem.
You should see the following information on the screen....
Dire Wolf version 1.6
Includes optional support for: gpsd hamlib cm108-ptt
Reading config file direwolf.conf
Audio device for both receive and transmit: plughw:2,0 (channel 0)
Channel 0: 1200 baud, AFSK 1200 & 2200 Hz, E+, 44100 sample rate.
Ready to accept AGW client application 0 on port 8000 ...
Ready to accept KISS TCP client application 0 on port 8001 ...
create a /et/systemd/system/direwolf.service file
[Unit]
Description=Direwolf
After=network.target
[Service]
Type=forking
ExecStart=/usr/bin/screen -S direwolf -d -m /usr/bin/direwolf -c /path/to/direwolf.conf
Restart=always
[Install]
WantedBy=default.target
---------------------
you may need to install "screen" if not already on your system
you can see the output of direwolf by typeing: sudo screen -r direwolf